New Beginnings
Just as you did at the beginning of this tutorial, start Slicer. Now, instead of doing everything from Square 1, we'll just reload the previously saved data files. Under the "File" menu, select "Load Scene." A dialog box should come up. Navigate to the directory where you saved your scene file ("ankylosaur," right?), and click on it. At right, you'll see a file called "anky.mrml." This is your scene!
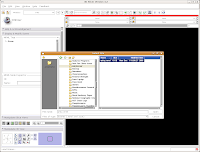
Select this file, and then hit the "Open" button at the bottom of the dialog box. You'll see a little message that indicates the old scene is being loaded.
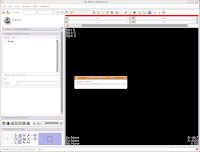
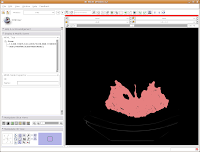
After a few seconds, you'll notice that everything is right back where you left it! Labels, DICOMs, all of those are loaded.
Seeing in 3D
You're probably wondering when and if you'll ever get to make a 3D model. So, let's get down to it!
We're now going to create a 3D surface model of the segmented data. In order to see what we're doing, let's first change the views from the single slice to one that will allow us to see the 3D image we're creating. Go up to the toolbar, and find the layout button (it should say "Choose among layouts for the 3D and Slice viewers" when you mouse over it). Click on it to bring up the menu of possible views, and click on "Convential layout." The lavender-colored area is where the completed 3D model will eventually reside.
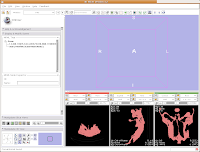 Click on the "Modules:" button on the toolbar, and go down until you find "Model Generation." Another little submenu comes up, and click on "Model Maker." Now, the left-most side of the Slicer screen will change to show the "Model Maker" parameters. We'll want to change a few of these in order to get going.
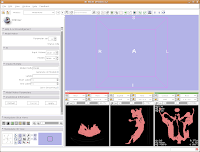
First, you see a little option called "Parameter set". Click on the up or down arrows next to this, until you find "Model Maker1".
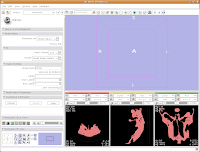
Below this you see options for "Input Volume" and "Models." Click and hold on the "Input Volume" option, and select "skull." This is the label map we created earlier. Next, click and hold on the selector next to "Models," and select "Create New Model Hierarchy."
Finally, you'll see a little area where you can type in "Labels." As you may remember, our label color for the skull was "5" (vessels). If you forgot this, you can just slide your mouse over the segmented images in the lower right part of your screen. As you slide over the red areas, you'll see a little indicator in each CT slice viewer that says, "Lb: 5.0". Slide off of the red areas, and the indicator goes to "Lb: 0.0". "5" is the color of your segmented bone, and "0" is the unsegmented, black areas. So, in the "Labels" area at left, type "5".
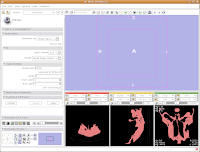
Now for the moment of truth. . .hit "Apply," and sit back and relax while your model is created! Things will go gray at the left of your screen while the model is computed, and at the bottom of the screen a little progress indicator gives helpful information.
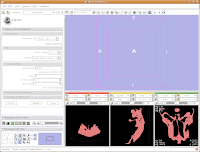
After about 20-30 seconds (or more, depending on the speed of your computer), a model will appear in the 3D viewer. All of your hard work has paid off!
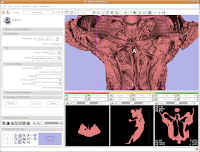 Looking at the model
Most likely, you can't see the entire model right now. So, change the view (under the layout options button) to the 3D only layout. Just like in the slice views, you can zoom in and out, and even rotate the image.
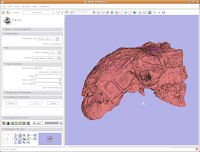
To zoom, hold down the right mouse button and drag up and down on the screen. Or, spin the middle mouse wheel. To pan the image, hold down the middle mouse button drag around the screen. To rotate the image, hold down the left mouse button and drag. You're getting a privileged look at a rare dinosaur specimen!
Changing views
Of course, now you've got a red ankylosaur skull on a lavender background, with pink lines going through the middle of everything. Fortunately, Slicer is remarkably customizable.
In the lower left part of the screen, you'll see a set of buttons under the title of "Manipulate 3D View." To change the background color, find the button that pops up a context menu of "Toggle visibility of elements in the 3D view". It looks like a little eye. Click and hold, and select "Black background." You should see the background of the 3D view change to - you guessed it - black. To get rid of the pink box and axis labels, go back to the same button, and deselect the options for "3D cube" and "3D axis labels."
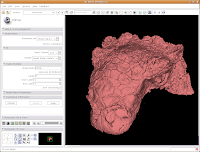 Now, let's make our ankylosaur skull a more "natural" color. Under the "Modules:" drop-down toolbar at the top, select "Models". The bar at left will change, and you'll see a whole new set of options.
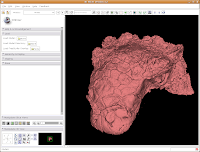
Click on "Load" to contract this set of options, and click on the "Hierarchy & Display" bar to expand this area.
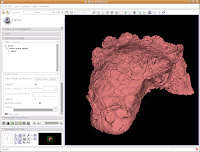
Under the "Model Hierarchy" area, click on "Model." This is the model of the skull that we just created. Now, we can change some colors. Because the options go for quite a ways, you may have to use the scroll bar to go down a little. Click on "Set Color..." (either the red colored box or the text next to it).
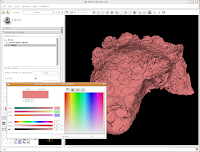 This brings up a whole new dialog box, with a world of colors! On the area at right, you can drag around to find a new color. Alternatively, if the choices overwhelm you, there is another way. You'll notice a few tabs above the color palatte. Click on the one that brings up the "Basic Colors" option. A much more limited set of options now appears.
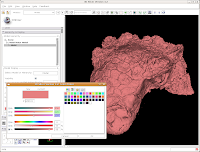
In the interest of making it look like an unfossilized skull, select the white at the end of the fourth row. Then, hit "OK."
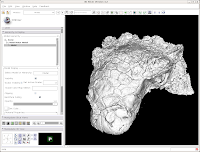
You've now got a sparkling-white Ankylosaurus skull! You can rotate, zoom, and inspect morphology to your heart's content.
Finishing Up
For the end of this tutorial, let's save our work to date. Under "File," select "Save." Everything should be the same as before, except there's a new entry for the skull model.
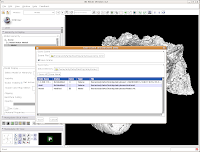
Check to ensure that it's being saved in the ankylosaur directory (it should be, if all went well), and hit "Save." You're all done! The model is now saved in VTK format, and can be reloaded later.
That's all for this phase. You've loaded data, segmented it, created a model, and saved your work. In January, I'll begin the next phase of the tutorial - talking about how to segment out specific structures (e.g., the endocranial cavity), make measurements, and the like. For now, enjoy your newfound skills!

10 comments:
Thanks for the tutorial, Andy. I plan on trying this out with some of my own data in the new year.
Thanks for the tutorial. You said you would continue in January. Do you think you will be getting around to part V of 3d Slicer?
-Mike
I'm aiming for next week now. . .
For anyone else who's using Slicer v3.4 and struggling to find the Model Maker module under a Model
Model Generation submenu, it's moved: you can now find it under Surface Models in that top-level Modules dropdown.
Thanks very much, Andy!
Your tutorial was very simple and clear! Brilliant!
Hello andy
Your tutorials are good and helped me learn how to use the 3D slicer.
I want to ask if there is a way to run an atomization batch script that will load MRI pictures and will display a 3D rotating presentation of the model so you can just double click without entering the Gui?
Thanks
Liran.
Thanks for this tutorial - exactly what I was looking for!
Thanks a lot for your tutorial on Slicer3D.....
Thanks for the tutorial! Can I create a 3D volume using only the axial images? For some reason I was able to create a 3D volume with the exemplar MRHead file (comes with Slicer 4.1.1) but not with my own set of DICOM images that only has the axial slices. Is there a way to do it? Thanks for the help!
Thanks for the tutorial! Can I create a 3D volume using only the axial images? For some reason I was able to create a 3D volume with the exemplar MRHead file (comes with Slicer 4.1.1) but not with my own set of DICOM images that only has the axial slices. Is there a way to do it? Thanks for the help!
Post a Comment