In the previous segments of the tutorial, we learned how to load data, view data, segment the data, and create a simple model. In this part of the tutorial, we'll explore some of the editing tools for more sophisticated segmentation. This section assumes that you're already familiar with the basic features of Slicer (essentially, those features outlined in previous posts). Thus, I'm going to gloss past some of the steps we've already covered (loading data, saving data, etc.).
Also, note that I'm using 3D Slicer Version 3.3 Alpha. I like working at the bleeding edge of the software, but the features I discuss should be pretty operational in version 3.2 or earlier. I did notice a bug with one of the tools (the change island tools) in the 3.2 alpha that I had, but this seems variable across operating systems. Most of you already know that I run my build of Slicer in Linux, but the tools are all the same if you're using Windows or Mac.
For ease of presentation, we'll switch datasets from the fossil ankylosaur of previous sections to a modern alligator with the flesh still attached. This specimen is just a little easier to work with as an example.
Note: If you experience issues with graphics (a white screen where a CT slice should be, for instance), experiences suggests that turning off graphical effects in your OS will solve the problem.
A New Dataset
First, download and extract the alligator dataset from the Witmer Labs web page. For ease of access and organization, let's create a folder to store all of our data files and CT slices--in this case, I'm calling my folder "gator." Place the CT data in there (Alligator_mississippiensis_OUVC9761_DICOM-data should be the folder name), and then we're ready to get to work.
As before, load the CT volume into Slicer (accessible through the File-->Add Volume menu).
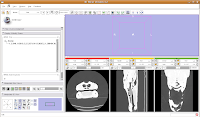 For ease of viewing, I changed the window and level settings under the Modules section of the toolbar, by selecting "Volumes". In the Volumes section that pops up, hit the display tab. Now, you can adjust the window and leveling options. I used settings of 1600/250 (you can type this in the dialog box). As you'll note, the bone and flesh will stand out more crisply now, versus the default settings.
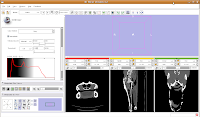 Now, let's switch to a single slice view, for the red slice (it's labeled as the axial slice here). Zoom in an appropriate amount, to get a better view of what's going on.
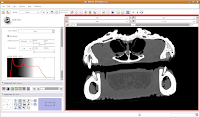 The white areas are bone and teeth, the gray areas are flesh (muscle, skin, fat, etc.), and the black areas are air. Note the nasal passages and sinuses in the middle of the skull. Areas of air elsewhere (such as in the lower jaw) are probably due to a mild amount of decomposition after the death of the animal (yes, this is only a severed gator head, not a live animal).
Now, move to the editor (as a reminder, you'll find it next to "modules" and start a new label map. In the box for "Name for label map volume," call it "gator." (I know, not very creative).
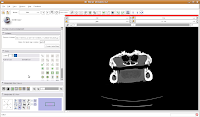 Next, let's threshold the label so that only the skull is highlighted. Click the "threshold" button, and adjust it to something that gives you a good picture of the bone. I found a lower setting of 300 and the default upper setting for the range did pretty well in my book.
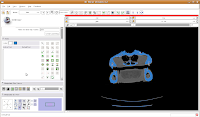 Do note that if you're using your reconstructions to measure things like volumes, surface areas, etc., you'll want to be very careful about how you threshold (reasons behind this could fill another post altogether). For the purposes of our reconstruction to just show morphology, it won't make much of a difference.
Taking a New Path
So far, we haven't done anything new over the previous sections of the tutorial. You could create a model right now and have a nice gator skull to look at. But, what's the fun in that? Now, let's really take a look at the editing tools in Slicer.
Before we get started, let's save our work so far. This will guard against the annoyance of a glitch, crash, or unintended mouse click that could ruin our hard-earned segmentation efforts. I'm going to save the whole batch in that "gator" directory I created earlier, following the steps outlined a few posts back. Make sure to save both the scene and the data files.
At this point, you may notice that part of the gantry is selected in our default blue color. If you were to make a model right now, this (and any other little bits of noise) would be rendered and obstruct our view of the skull itself. Fortunately, there is a really easy way to get around this: the "change island" tool.
In Slicer, an "island" is a group of contiguous pixels in a label map. All pixels of a single label color that touch each other in the three-dimensional image stack are part of this island. So, the "change island" tool works something like the paintbucket tool in Photoshop or GIMP. You can use it to quickly and easily change the color of a massive area! However, you much be careful that there aren't any "leaks" into an area you don't want filled.
You'll find the "change island" button in the fifth row of the second column on the editor toolbar at the left side of the screen. Click on it, and some options will show up. First, let's change the label color to "5". This means that the blue label will change color to red. The other option, scope, can be left as is for now. Scope just tells you whether you want to fill across the entire label volume or just within a particular slice.
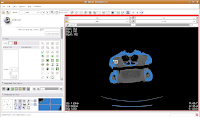 Once we've changed those options, click on a blue area within the jaw. Your computer will chug along for a few moments (the speed of the chugging depends largely on the speed of your processor--a faster computer is always better, regardless of what data analysis program you are using), and then you should notice a major portion of the label map turn red. The gantry and a few other isolated flecks remain blue (label map value "1").
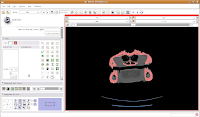 Next, go to location 60 (type it in the dialog box towards the upper right corner of the screen, and hit enter). Towards the bottom of the gator head, you'll see four blue areas. These are the hyoid bones. Let's segment them in a peach color (label map value "2"). It is helpful to zoom in a bit, to make click placement easier. As before, change the label color to "2", and click on each of the four islands of pixels, one at a time.
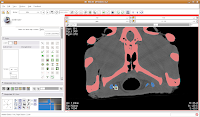 Your computer will chug along again, and then you should have the hyoids segmented out pretty nicely. It is a good idea to segment each segment of the hyoid individually--that is, wait for the color on one to change before clicking on the next. This will avoid disappointment if you make a poorly-placed click.
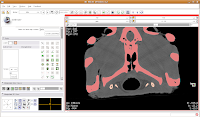 Now is a good time to save your hard work, before we move on to the next step.
Let's Make An Endocast!
If you're like me, you were first fascinated by CT scanning as a way to glimpse internal morphology or make renderings of anatomical structures. So far, everything we've done is interesting, but not much better than picking up a real specimen and turning it over in your hand. A great deal of research lately has centered on making digital endocasts of structures such as the brain, or sinuses, or neurovascular canals. Now, we're going to make a quick-and-dirty endocast of our alligator.
First, a brief digression. Making quality digital endocasts is a skill and an art, requiring anatomical knowledge as well as a bit of finesse. Give the same dataset to three different paleontologists, and I guarantee that you will get three slightly different versions of the endocast. It all depends on thresholding, patience, and interpretation. One of the real keys is practice--you will not necessarily get a research-ready endocast on your first attempt. As you gain experience, you'll quickly figure out where to draw the line for boundaries, etc. All of this will make a difference in the final reconstruction (and is an extremely underappreciated and underplayed aspect of those fancy figures you see in papers by me and the other CTers out there). In other words, your first attempt may not be pretty--but it's a step in the right direction!
Ok, let's skip to slice 95. For now, we'll consider that to be the end of the endocranial cavity (not strictly true, but it works for this tutorial).
In the figure below, the mouse pointer is in the space of the endocranial cavity. This is what we're going to fill up to create a virtual brain (yes, yes, I know that the endocast is not synonymous with the brain - just deal with it!).
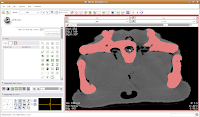 We're going to use the "change island" tool, with a twist. If we leave the scope for this tool at "All," we'll get a nasty surprise. The space of the endocranial cavity is, right now, contiguous with a whole lot of nothing. This means that trying to change everything at once would spill out into the entire label map, leaving a skull surrounded by a sea of "brains".
So, let's do things differently. Select the "change island" tool, and then change the color to 6 (green brains!). Next, change the scope to "visible". This means that only the slice currently in view will be affected. Move to the endocranial area, cross your fingers, and make a click.
 If all goes well, this little area will turn green! We're on the road to a gator brain.
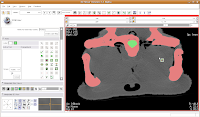 Hit the back arrow to move to the next slice. Repeat as before, for another two or three slices.
Tedious, huh? It would be really nice to find a way to automate the process. Well, now we can think about using the change island tool in a modified way. As you'll recall, we need a closed contiguous area of pixels in order to avoid brain spillage. But, the endocranial cavity is full of holes! In order to get around this, we'll create a "dam" of pixels.
One side of the dam is already in place. We'll just have to create the other side, now. As you scroll back through the brain, you'll find that it's a happy isolated space until slice 85 or so.
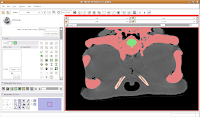 So, isolate this space. Now, scroll forward to slice 88 or so. Change the scope to "All," and click in the middle of the endocranial cavity. Once again, things will chug along for a bit. Once it's done, you can scroll back and forth and notice that the areas you had left blank are now filled in. How cool!
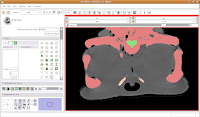 Now, let's turn our attention to slice 84. On the left side, you'll notice a little squiggly canal heading away from the endocranial cavity. In some cases, you might want to keep it. But for now, those sorts of things are just extraneous annoyances.
Introducing the Paint Tool
Zoom in to the endocranial cavity, and drag it so that it's at the middle of the screen (using the right mouse button and the mouse wheel, respectively). Now how are we going to keep the change island tool from filling into that canal?
Our answer is the Paint Tool. You'll find it in the editor toolbox, first column and third row. Click on the tool to select it. Now, if you move your mouse pointer across the slice, you'll see a big, big radius of effect. Not what we want!
 So, let's change the radius of our paintbrush. On the left side of the screen, you'll see a tool just for that. You can click on it and drag to move by integers, or enter a decimal value (in millimeters). For this slice, I found a radius of 0.25 or 0.5 to be pretty good. So, type this in the dialog box. Now, when you move the pointer over to the slice, you'll notice that the area of effect is much, much smaller.
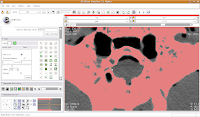 To block off this area, now just click and drag along the area you wish to enclose. Once you release the mouse button, you'll notice that a little green section is now in place.
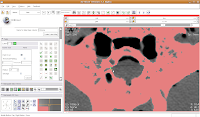 If you made a mistake, just hit the "undo" button in the lower right corner of the editor toolbox.
Now, select the change island tool, and make sure it's set to "visible." Click within the area of the endocranial cavity, and you'll notice that our green brain goo stays confined to the area we want!
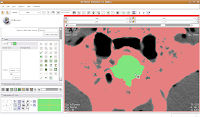 Making Some Progress
As you've probably noticed, the paint tool is perhaps a little haphazard for some processes. Sometimes you might accidentally overwrite part of the skull (the red colored label). In this case, just uncheck the "paint over" option. Nice and neat!
Continue on, filling in holes at the edge of the endocranial cavity up until slice 34 (for the last few, you'll have to delineate the entire bottom of the cavity).
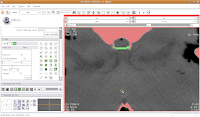 Then, go back and use the change island tool to fill in all of the slices for the brains. Once you've done that, save your work.
Modeling Your Efforts
Now, let's make an endocast! As a shortcut, click on the "MakeModel" button (seventh row, second column). Under name, type in "Brain" and then hit "Apply."
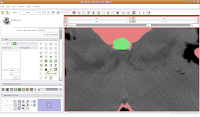 This will create a model for the label map currently selected (in this case, the #6 green). The model maker will run in the background for awhile--you'll see a little progress indicator at the bottom of the screen.
Once the model maker is done, change the view to "3D Only Layout" (using the fourth buttom over from the right, at the top toolbar).
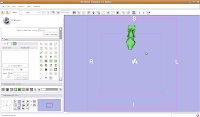 If you're lucky, you'll see your first digital endocast! If the model isn't visible, it's probably because it is still processing. Once the model shows up (this might even take up to a minute or two), you can click and drag to change the orientation.
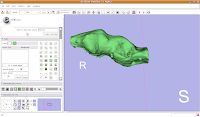 Finishing Up
Once again, save all of your work. Your model will be saved along with the label maps, and then you can take a well-deserved break!
Here ends part V of the tutorial. In the next part, we'll take a look at some ways to visualize your endocast in relation to the rest of the skull.

10 comments:
Paleo-nerd turned computer nerd, lol! (I hope you know I'm kidding.)
Anywho, Andy. I'm going to do my trademark "Fossil Fact" sometime this week and I'd like to talk about Acrocanthosaurus atokensis. And, I was wondering if you can help me. Can you review it when I have it posted so I tell my readers correct information? You can reach me at raptor.lewis@gmail.com
Andy - Interesting post, but what are the costs involved? I.E. How much does a scanner cost? What is the cost-per-scan? How much do the endocasts cost? Any chance smaller museums and universities with smaller programs will be doing this in the near future?
The software is free. . .as for scanning costs, most folks are able to work out free (or extremely cheap) scanning arrangements with local hospitals. In my experience, the radiology folks are usually thrilled to scan a few fossils! Medical CT scanners are perfectly adequate for most fossils. . .if you have a specimen that needs a little more juice, you might have to pay to send it to Austin or Penn State (I think costs are detailed on the web pages for their respective scanning facilities). As for printing out a 3D copy of the endocast, I'm not sure what this costs as I've never had to do it. All of my work is done virtually. . .So, these sorts of techniques could be worked from any institution, regardless of size.
For most paleontologists, the really big price tags come from software licensing costs for commercial software packages. So, Slicer presents a non-commercial alternative (and, it is probably all you need for most applications).
Fantastic tutorial, Andy. I've been waiting on this one for awhile.
Thanks! I hope it's worth the wait. . .let me know if you have any comments or suggested corrections.
I have been using Slicer 3.x on Windows XP and am having stability problems, like SLicer shutting down when I try to use the editor to make models, etc. Anyone else have this experience, or are you all so open-sourcy that you don't even know anyone who uses windows? (I should switch to linux, yes?)
Hi John--
We use a Windows machine at my museum for some Slicer work, and had similar issues with random shutdowns while using some tools. In the end, I found I just had to try a few different builds (either a "nightly test build" or a "stable release") to find the build that worked best. I don't remember which one it was off-hand, but can get back to you on this tomorrow, when I'm in the office. If you haven't subscribed to the Slicer users mailing list, this might also be a good chance to join and voice your concerns there, too. They're really good about response and feedback for these sorts of issues!
If it's just the model building component that's a problem, you can try building the model the "old fashioned" way, through the appropriate module as outlined in my last post.
I have found that the Linux version is generally more stable, but I'm not such a Linux zealot as to suggest you drop everything and become a Linux user! It's a good option, but not the only option. Windows (and even the Mac OS) have their good points, too.
Hey John, great tutorials! Im working through them so we can implement this technology in the army lab I work in. You said that you expereinced a bug with the change island tool. Was it that you could not select the island to be changed? I'm having difficulty with changing the islands and am using v3.2. Thanks again for the tutorial.
As I recall, my problem was when I tried to have it change islands across multiple slices - I haven't tried some of the newer builds (3.3 or 3.4), so they may have fixed it in there. Sorry I can't be of more help!
(it's always worth signing on to the Slicer mailing list, too. . .they can often give some good pointers)
Slicer 3.4 has many improvements in the editor module. The four island functions (identify, change, remove and save) are working. If you enable volume check points, you can undo.
Post a Comment